

How to start making zines: the one page zine
Plus zine bingo prompts for paid subscribers!

After addressing basic zine questions in my Zine 101 post last week, today I’ll be talking about how to start making zines—starting with the one page zine!
If you prefer to dive in and start making right away, join my free live workshop where I’ll guide you through creating a mini ‘about me’ zine! It’s today at 2-3 PM ET. If you’d like to attend, register here.
And if you’re sitting on a big zine idea that you’d like to make and publish within the next month, join Zine Lab! It’s a four week workshop from April 15 to May 6 where I’ll guide you through the zine making process, from idea to publication. Zine Lab has been filling up with only four spots left. Find more details and register here.
The one page zine
If you’re just starting out making zines, the eight page mini zine, aka the one page zine, is a great place to start.
This foldable zine only requires one sheet of paper and a pair of scissors to assemble to make one cut. It’s also easy to reproduce and distribute—all you need is to scan or assemble your zine onto one page and print however many copies. No binding, trimming, or double sided pages necessary!
Another bonus to this zine format is that you can easily unfold and refold the zine after it’s been assembled! Some artists use this to their advantage to create a surprise poster on the back, so the sheet of paper is both a zine and poster (albeit with a cut in the middle of it).
Want to try folding a one page zine now? Grab a sheet of paper and follow the handy instructions below:
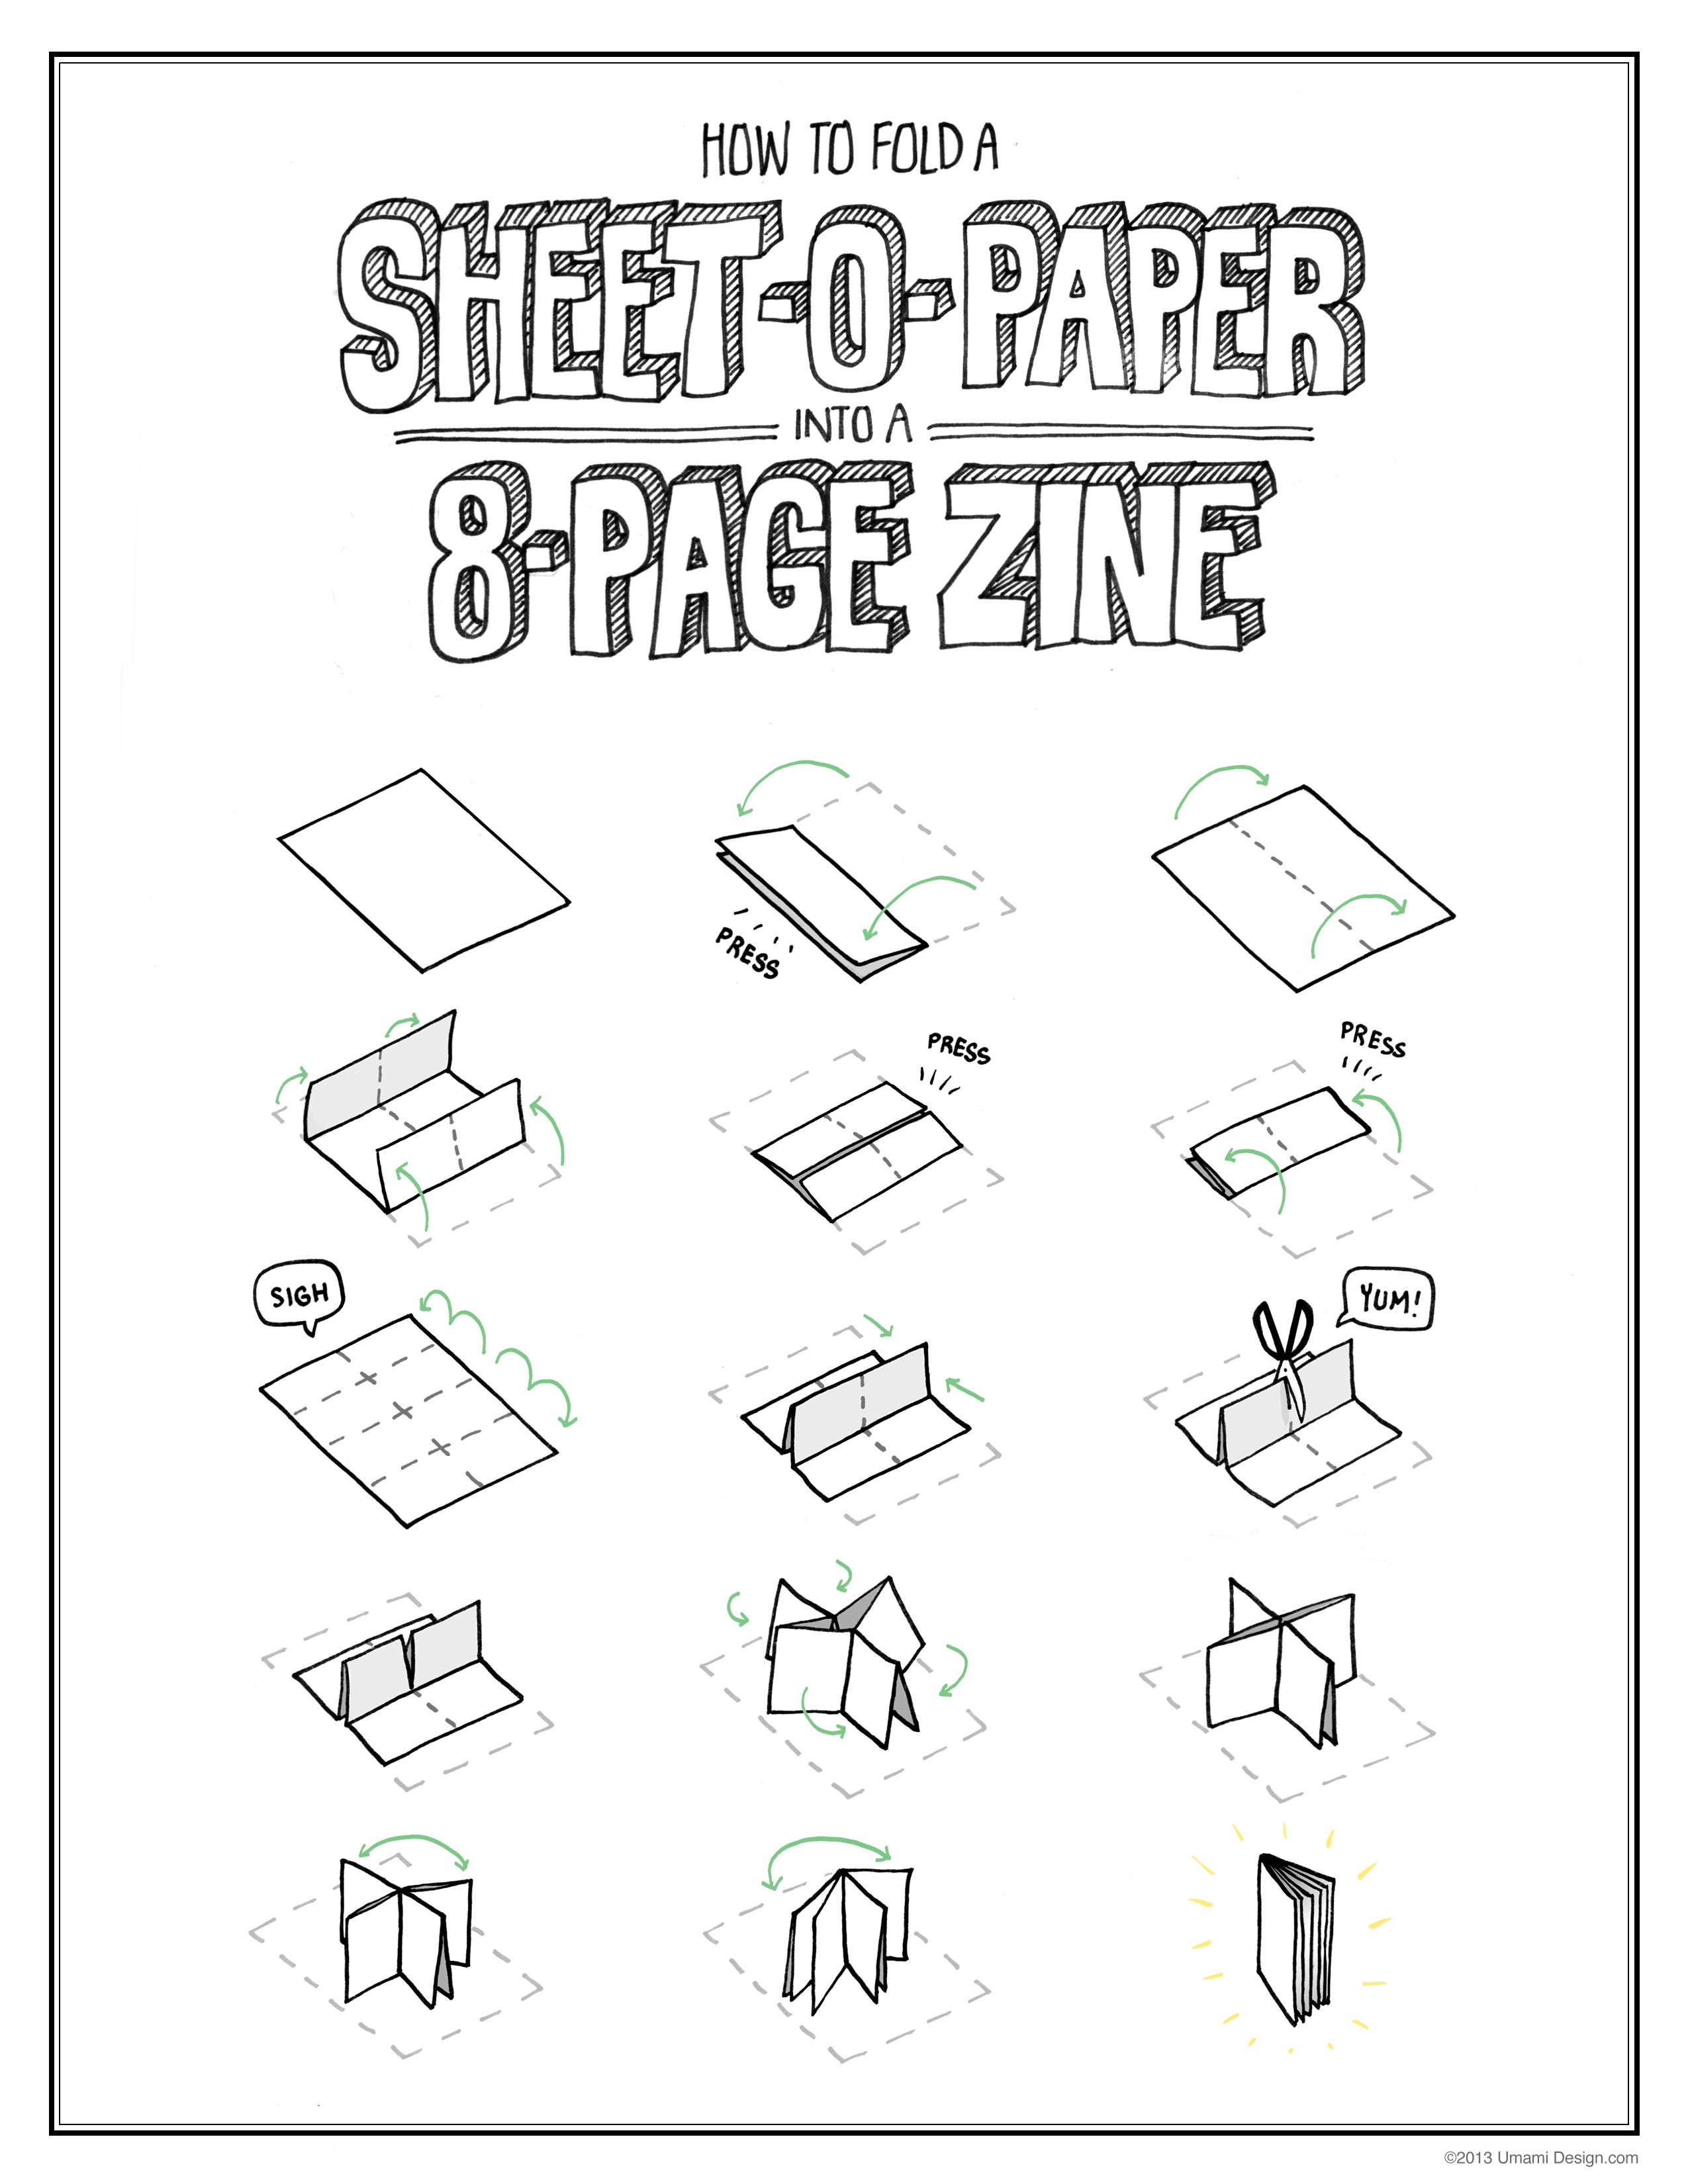
I also have a video showing how to fold my free printable one page zine:
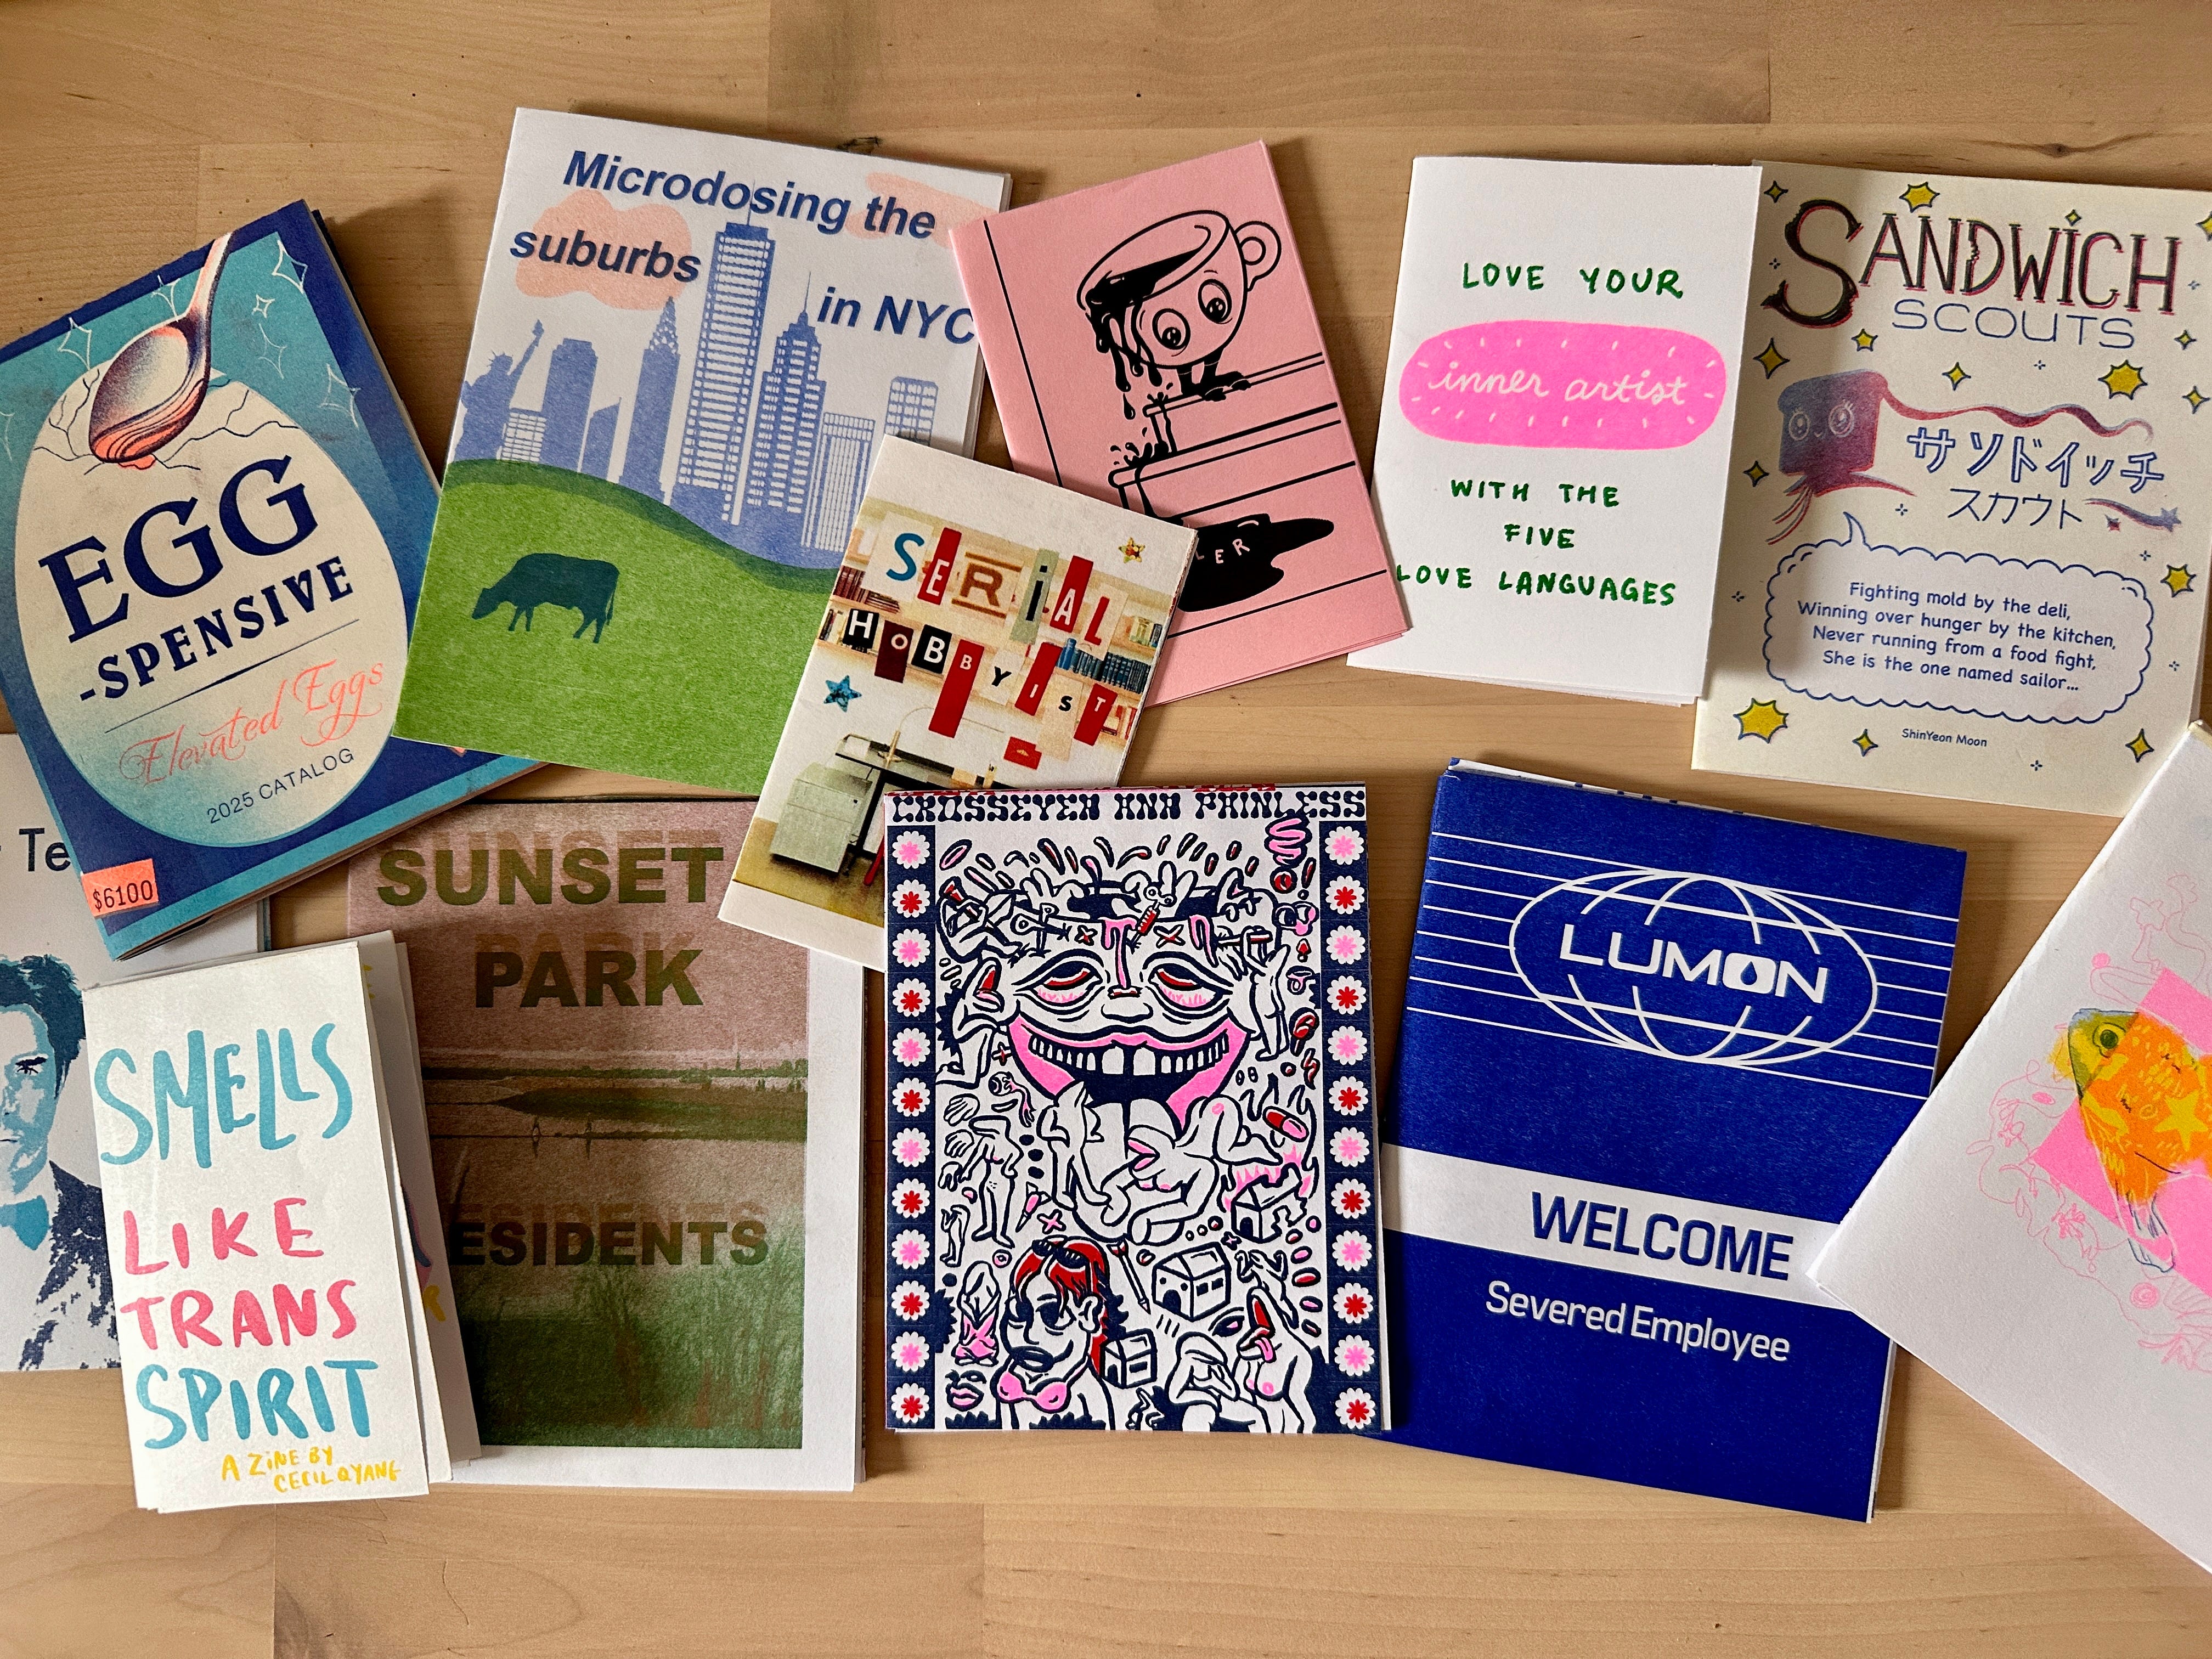
If you’d like to design a one page zine of your own, I’ve made two template PDFs for you to download and use! One is for letter sized paper (8.5x11”) and the other for tabloid size paper, which is the size of two letter sheets (11x17”). For reference, the smaller zines in this post’s header image is folded from letter paper and the bigger zines are from tabloid paper.
And for my non-North American folks, I’m jealous of your sensible paper sizes—here are links to A4 and A3 templates that I found online.
To use either template, bring it into your editor of choice, such as Photoshop, Procreate, or Canva, and use the lines and page numbers as your guide for where to place your pages. Each zine has a front cover (page 1) and back cover (page 8), so the inner content will be six pages long.
One minor technical note: I’ve noticed from the many templates I’ve seen online that the pages can be placed in two different positions! This doesn’t affect your zine order; it only affects where the “open” and “closed” pages are.
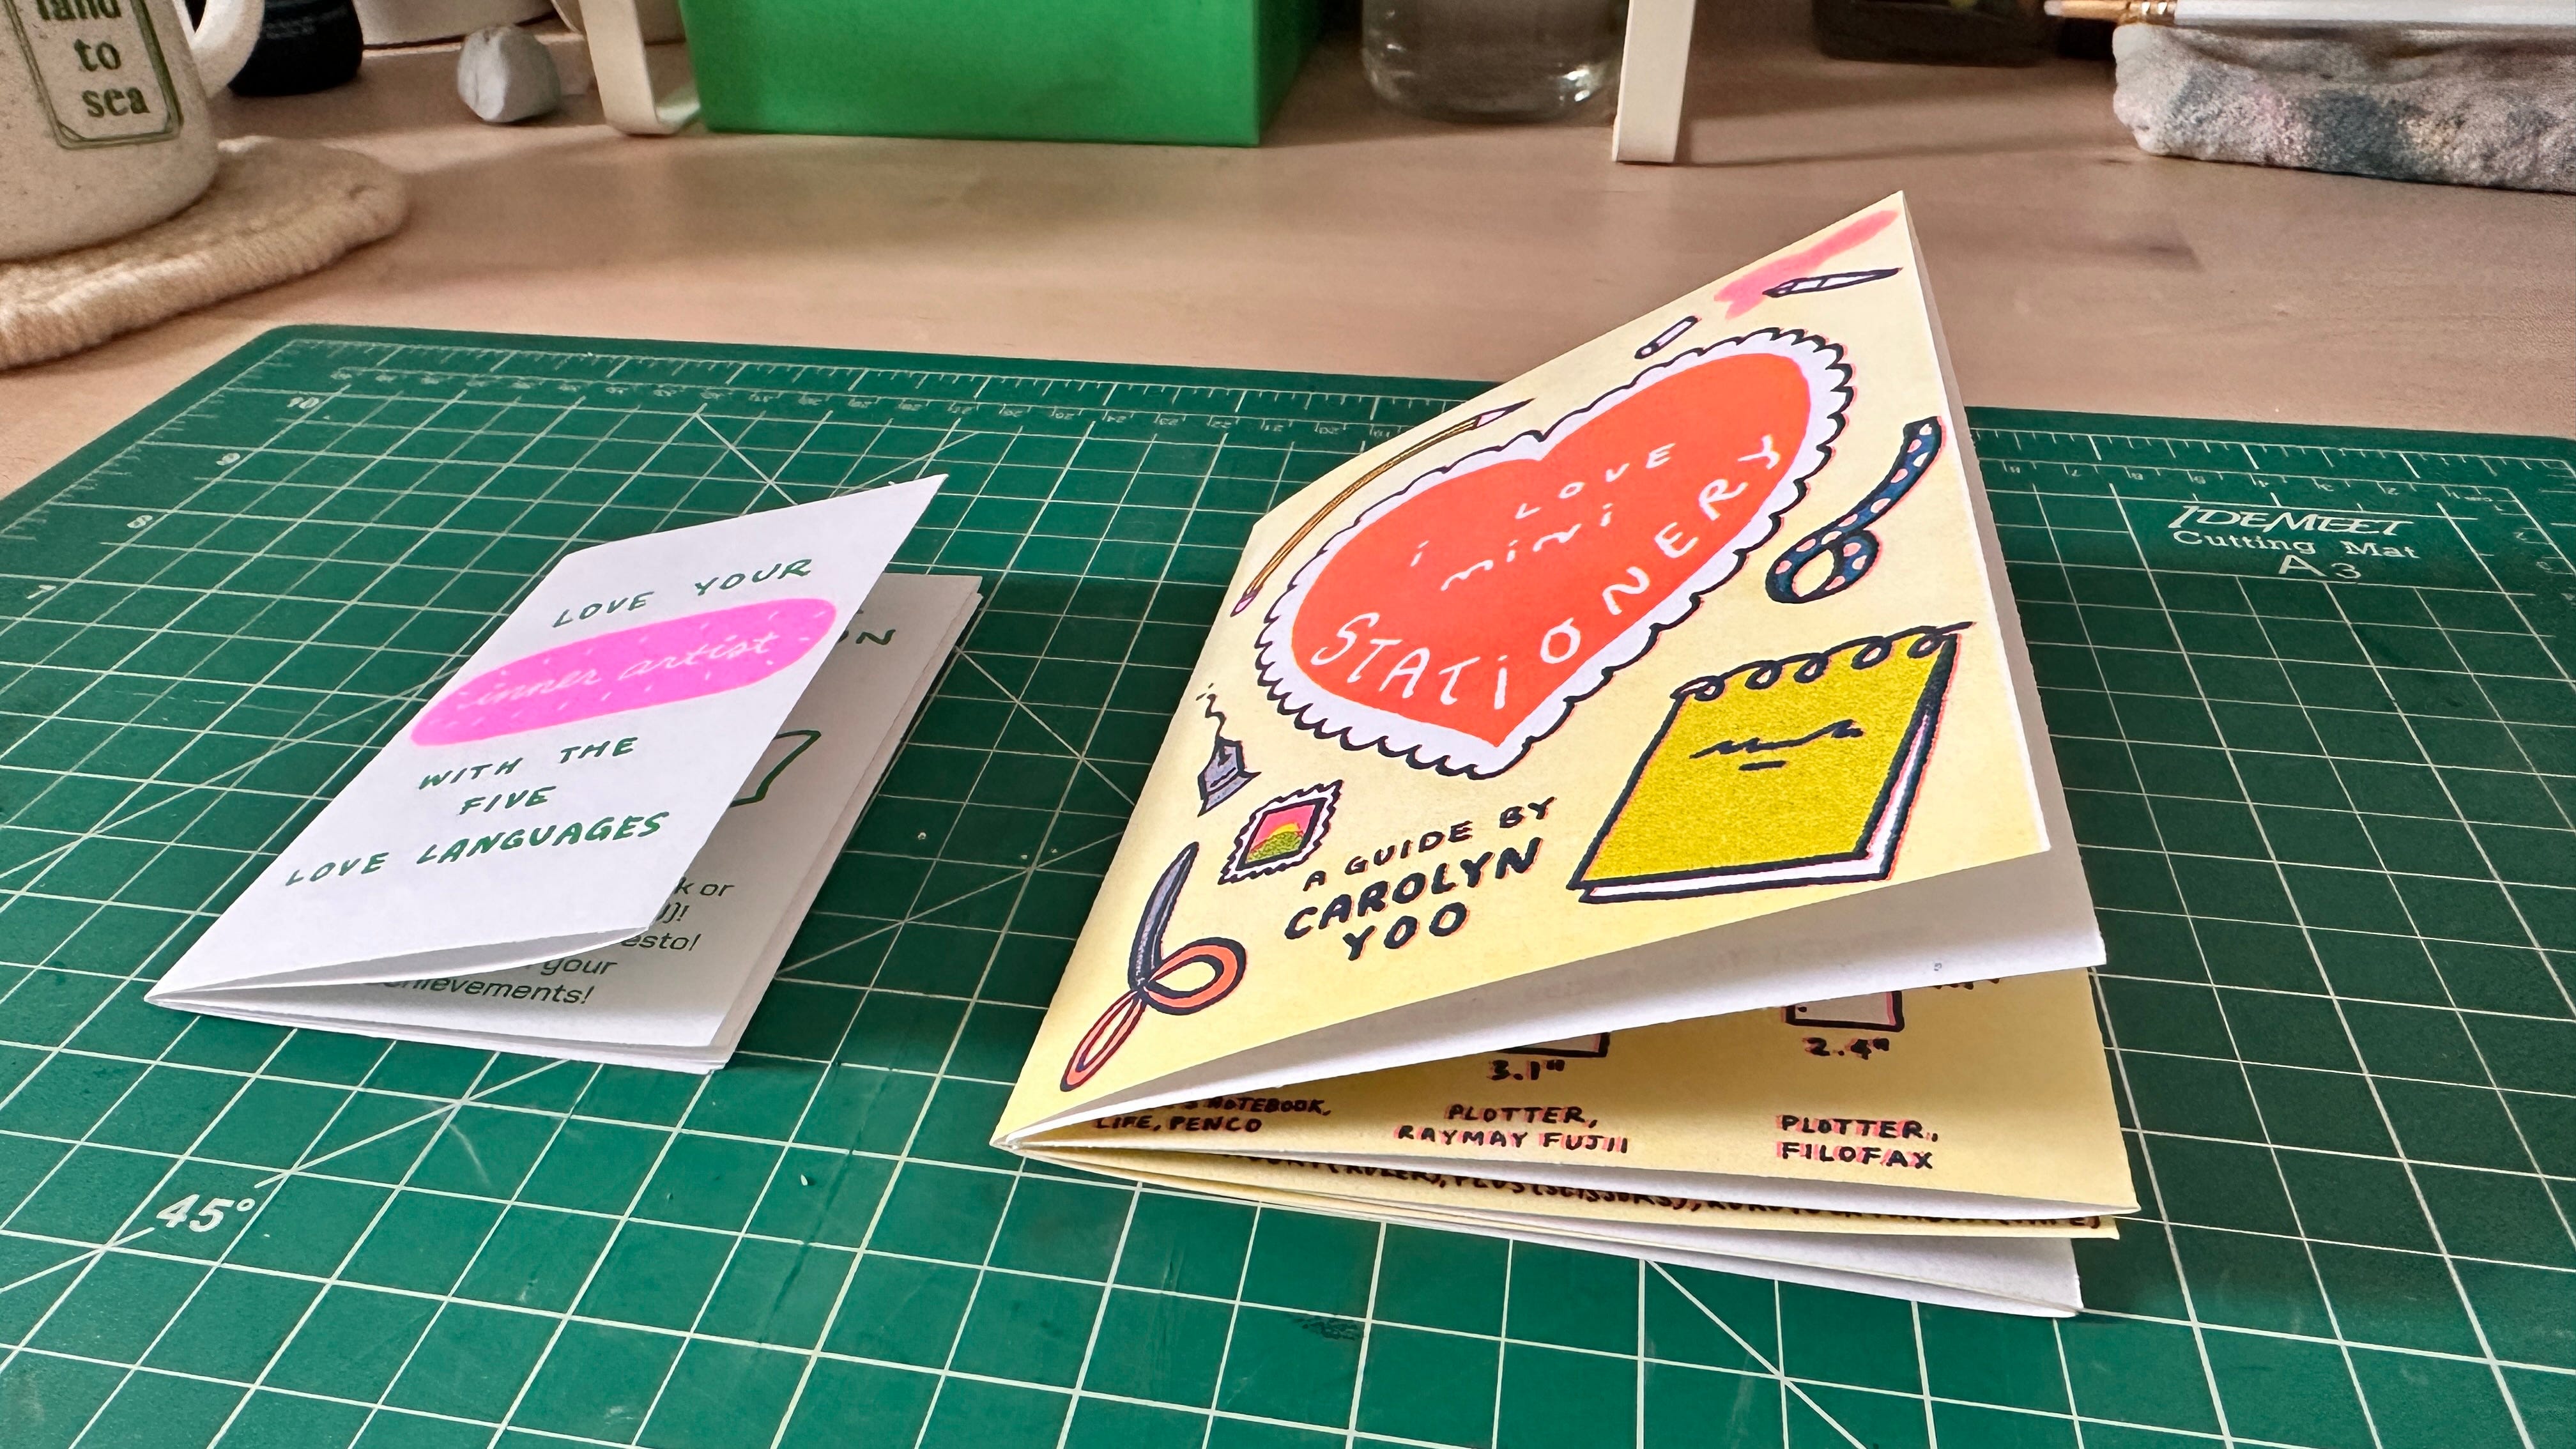
My templates have the front cover with a closed edge (above left), whereas other ones I’ve used have the front cover with an open one (above right). I prefer a cleaner front cover which is why I’ve set up my template with the closed edge, but it doesn’t matter all that much.
Now that you know how to fold a zine and set up one of your own, you may be wondering…what do I actually want to make? Creative block strikes again!